
ChatGPT
Connect xmemory’s MCP server to ChatGPT and your chats get xmemory’s read and write tools with no custom code. ChatGPT registers a custom MCP server as a plugin; the route differs between chatgpt.com and the ChatGPT desktop app, so both are given below, followed by the Codex CLI.
See the integration overview for comprehensive guides, API references, and integration examples.
API key: To use xmemory APIs or integrations (including MCP), you need an API key. Get one from the xmemory console. Copy and securely store the key. Never share your API key publicly.
ChatGPT on the web (chatgpt.com)
Section titled “ChatGPT on the web (chatgpt.com)”Walked on chatgpt.com, Plus plan, August 2026. The desktop app takes a different route.
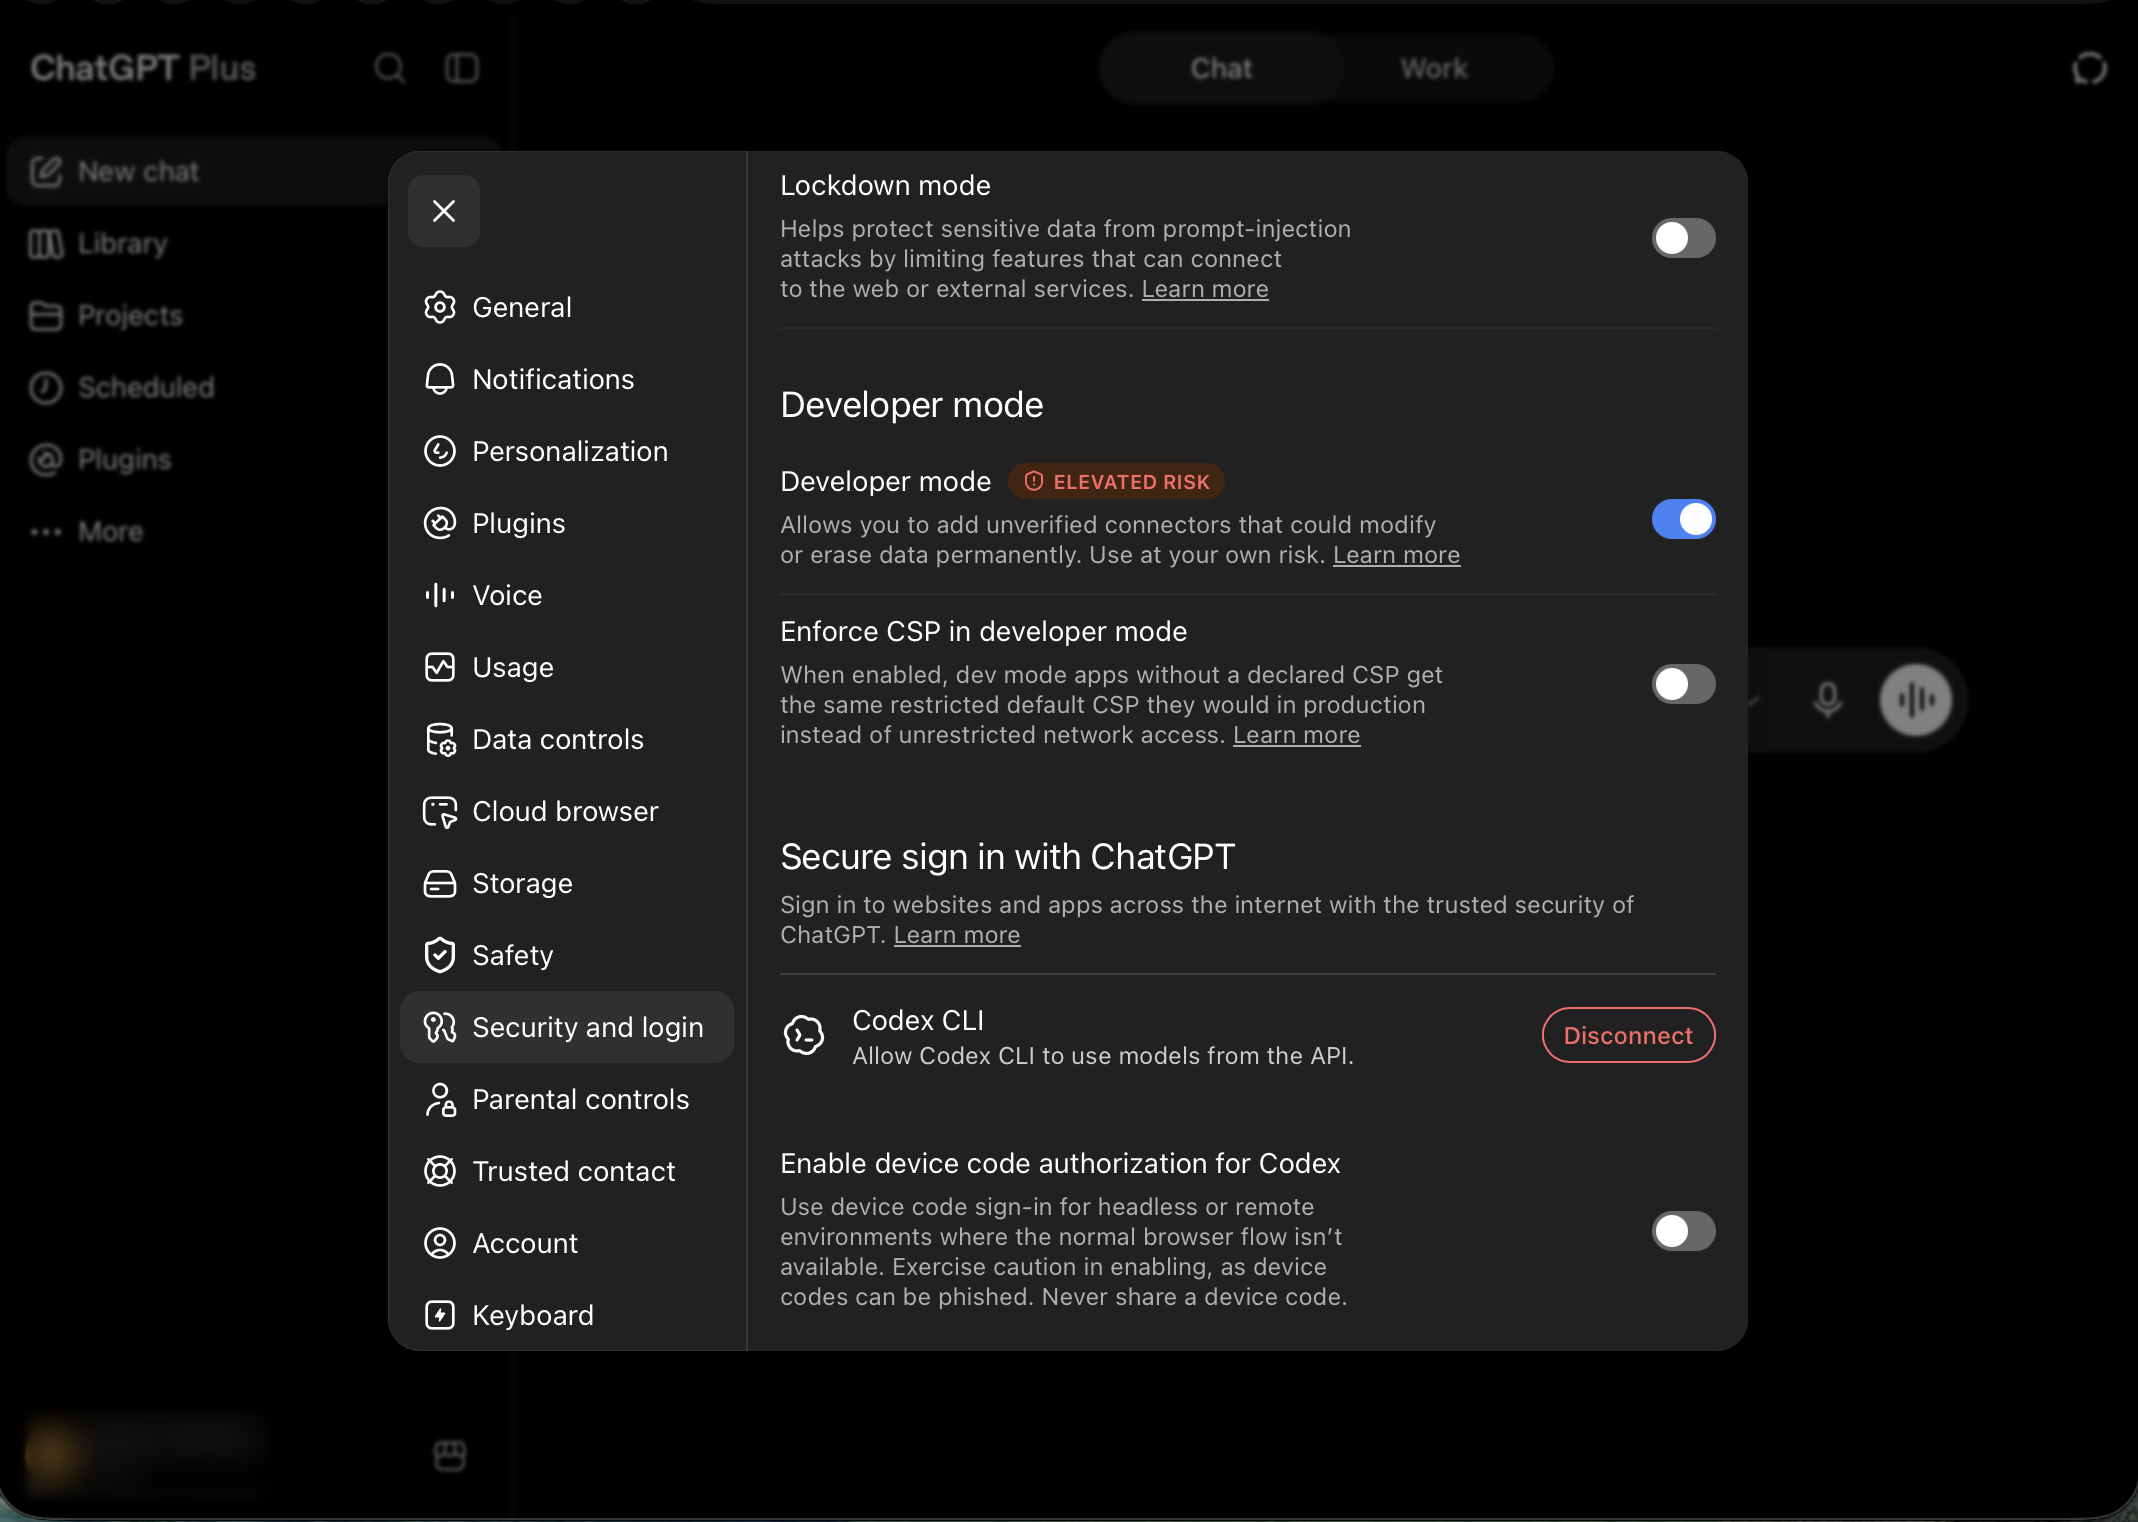
1) Turn on Developer mode
Section titled “1) Turn on Developer mode”Open Settings → Security and login and enable Developer mode (it is labelled ELEVATED RISK). Until it is on, the Plugins page has nothing on it to add a custom server with.
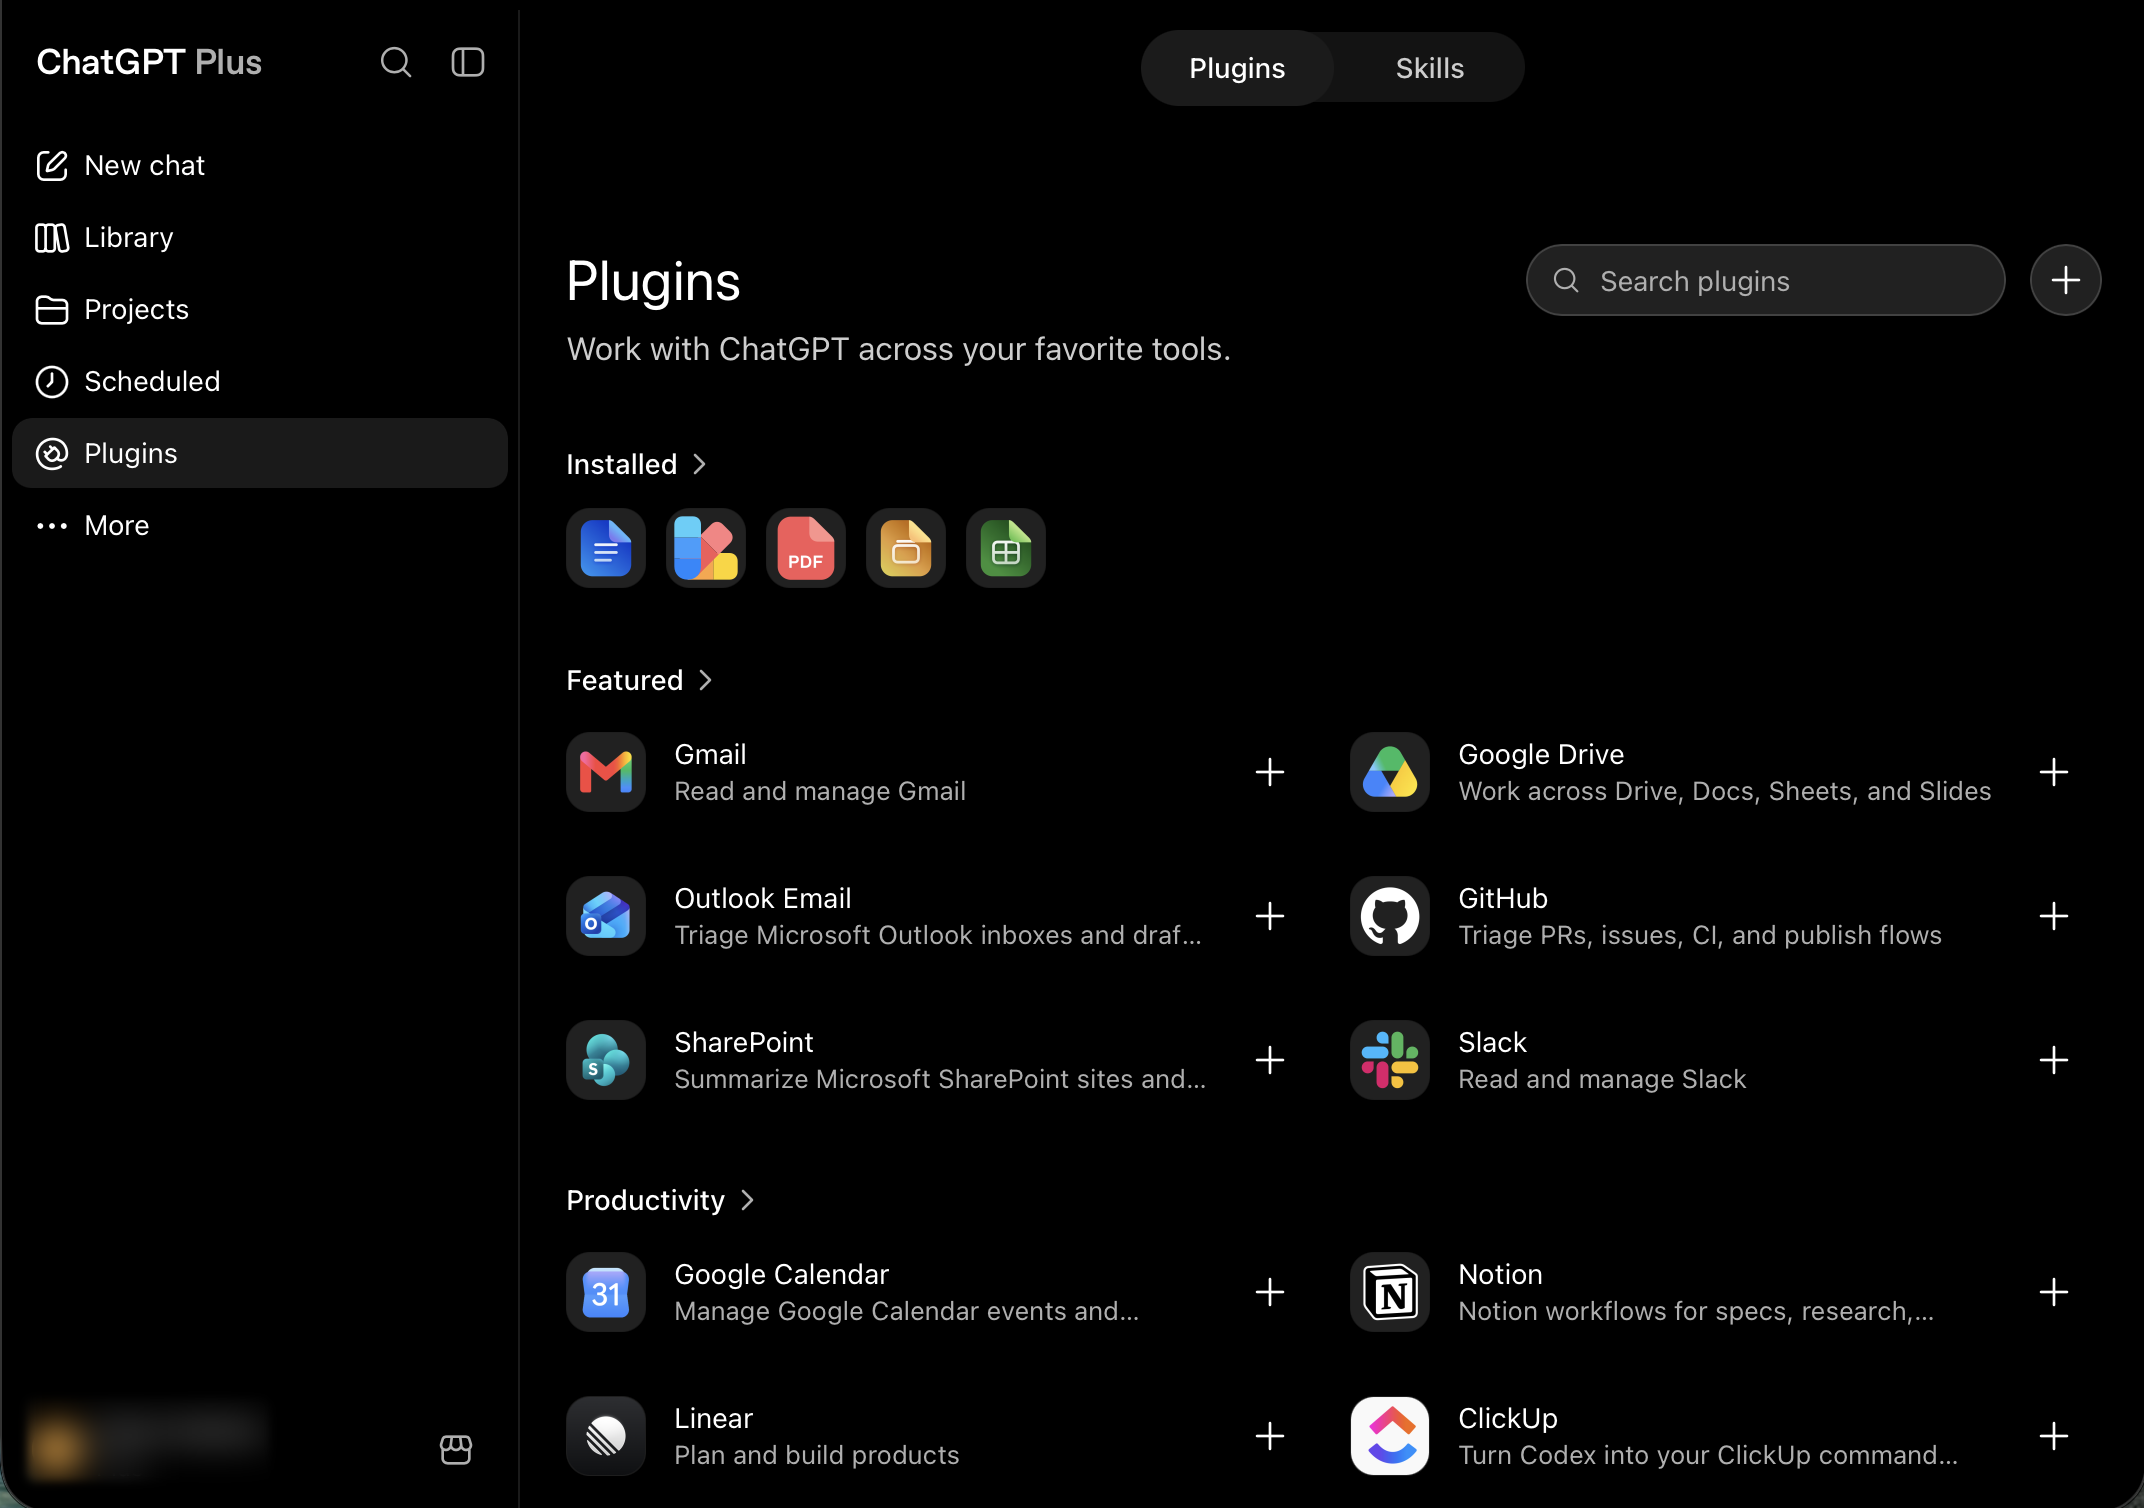
2) Open Plugins and click +
Section titled “2) Open Plugins and click +”Open Plugins — a top-level item in the left sidebar — and click the + beside the search box. The + is only there once Developer mode is on.
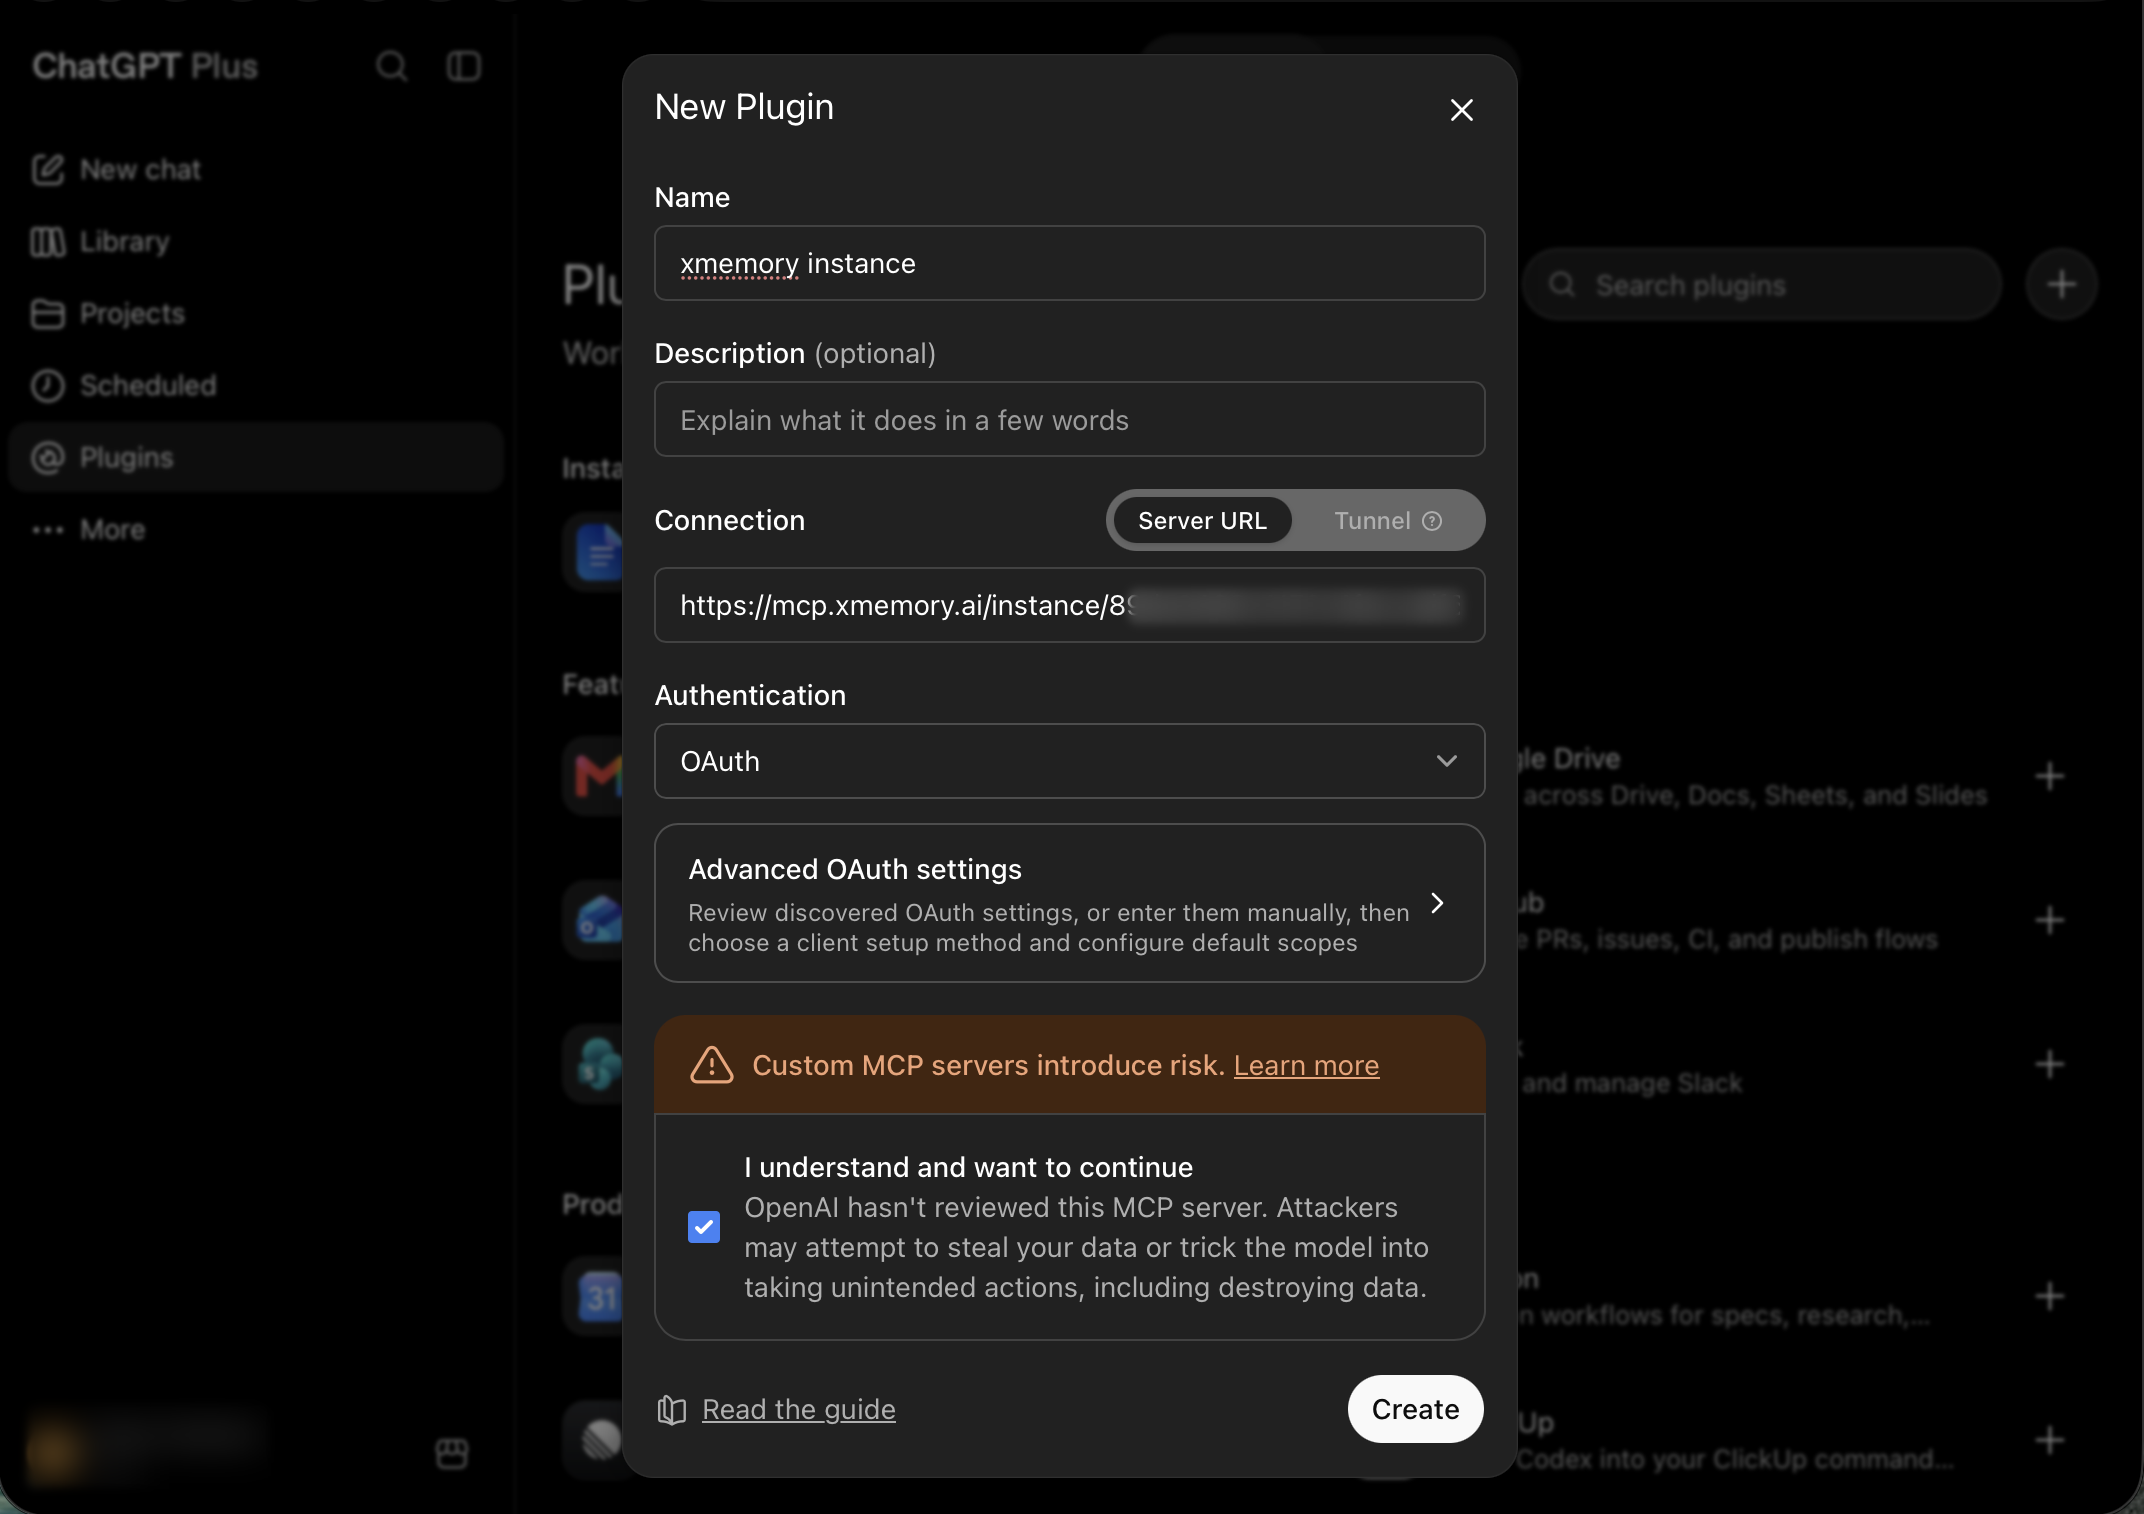
3) Fill in the New Plugin form
Section titled “3) Fill in the New Plugin form”In New Plugin: give it a Name, keep Connection on Server URL and paste your xmemory MCP URL, and leave Authentication on OAuth:
https://mcp.xmemory.ai/instance/<instance_id>The instance path binds the plugin to that instance up front. (To pick the instance during sign-in instead, use the root URL https://mcp.xmemory.ai/.) Tick I understand and want to continue under the risk notice — Create activates only then.
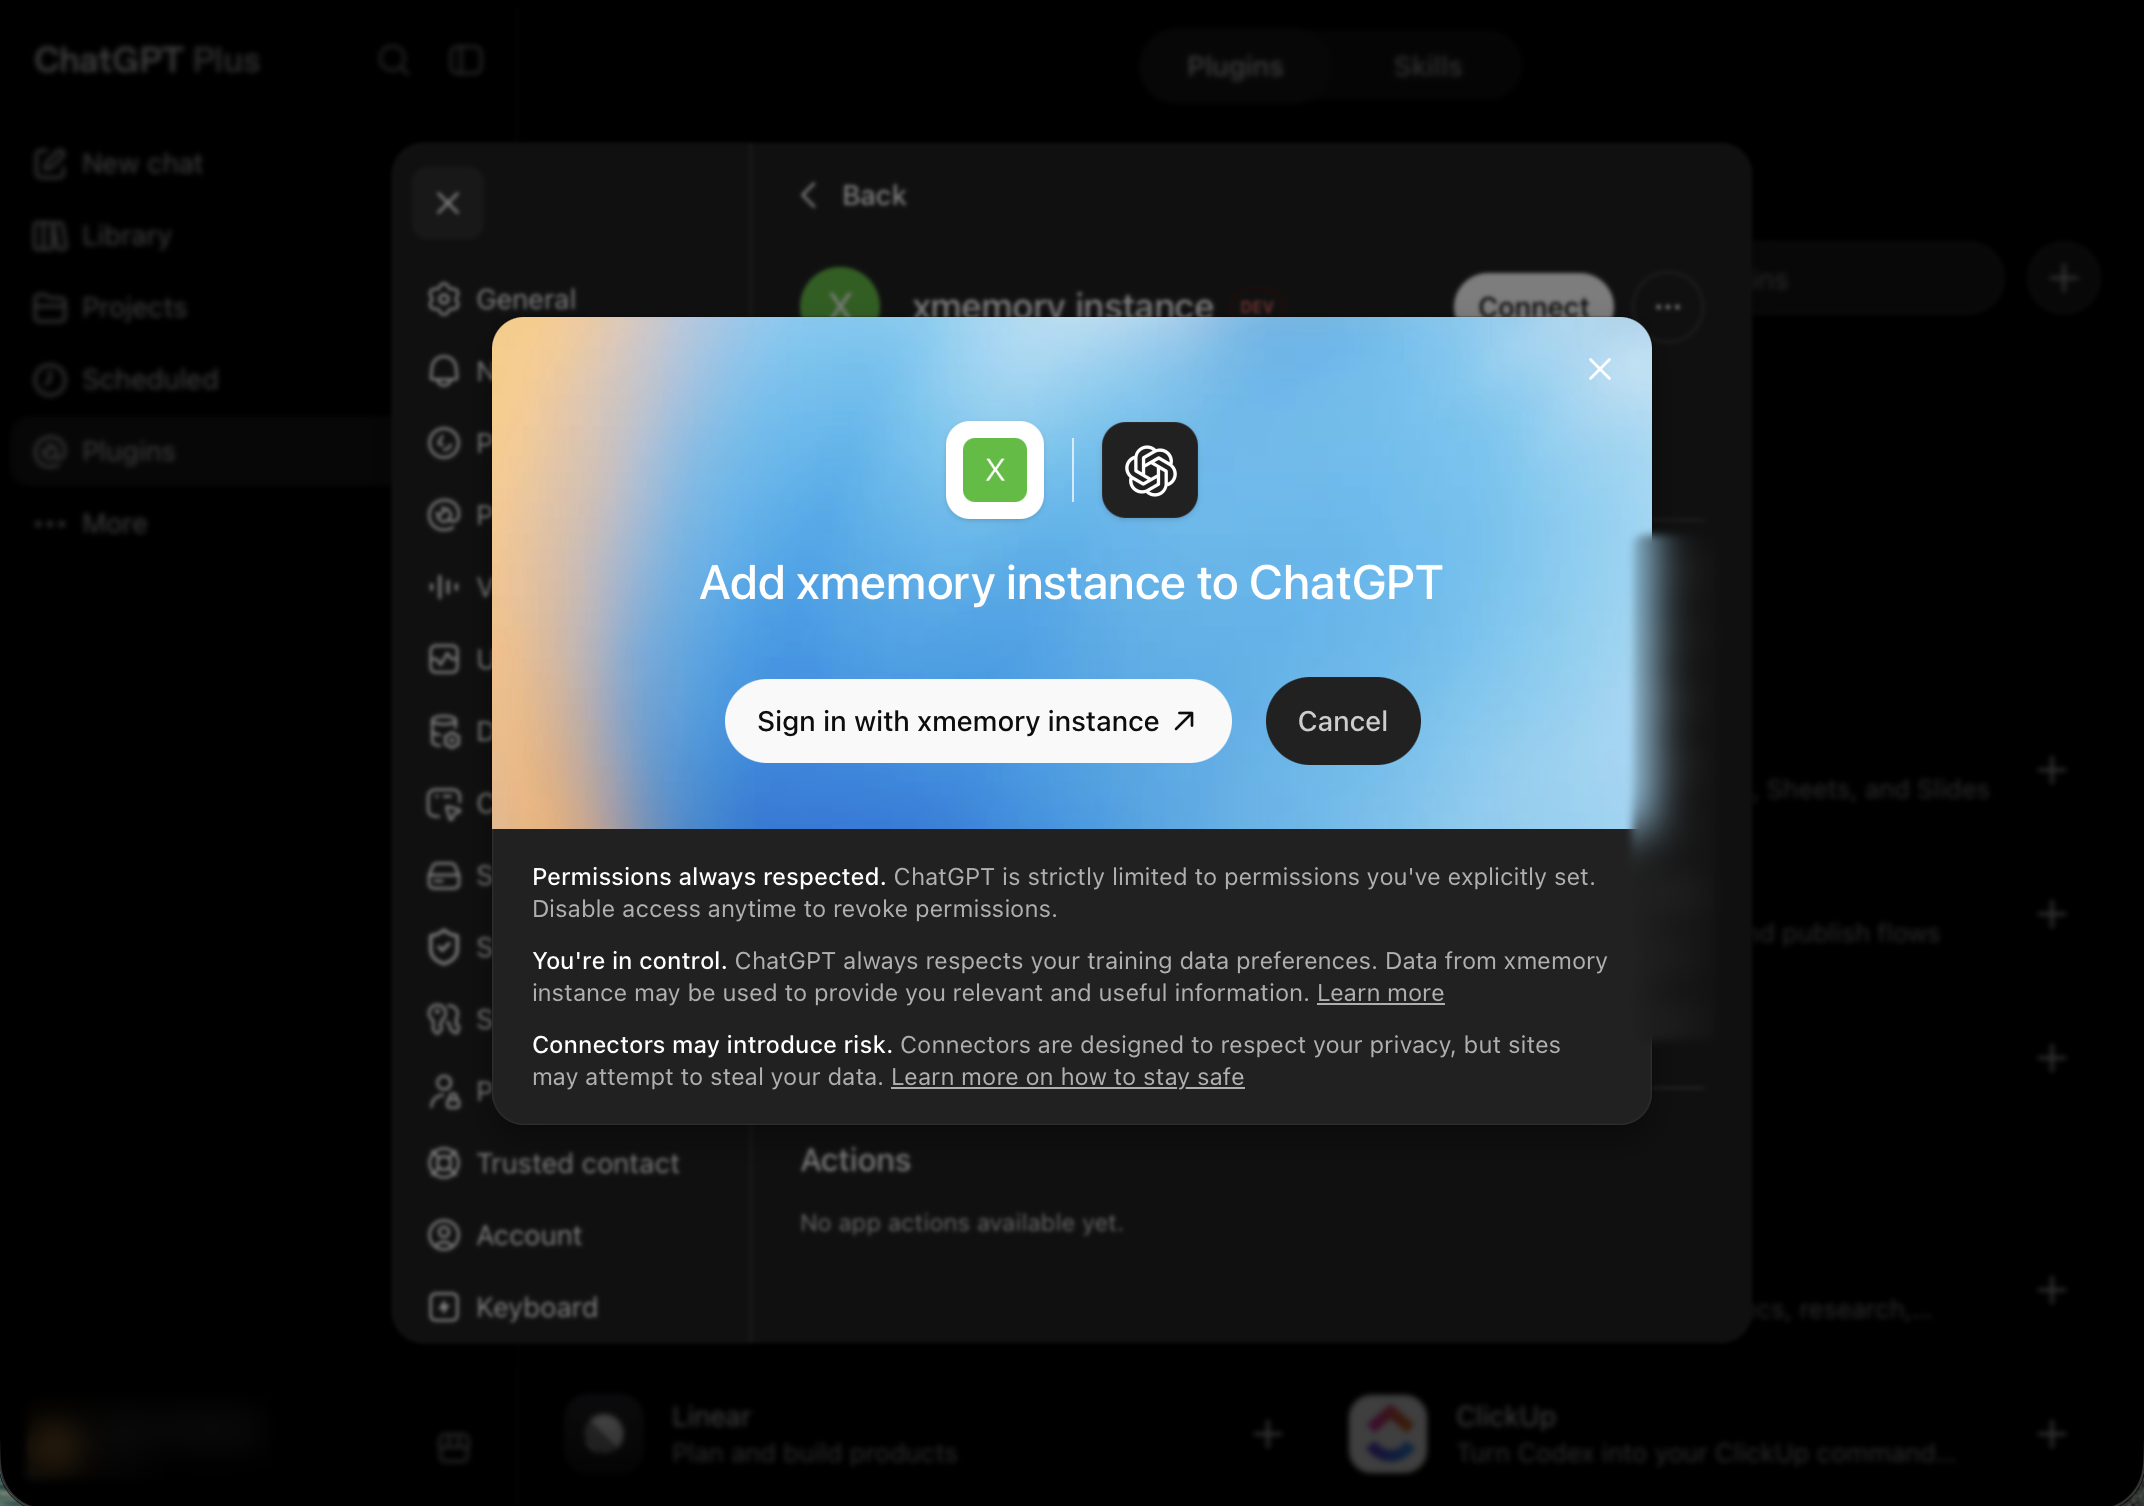
4) Connect and sign in
Section titled “4) Connect and sign in”On the plugin’s page, click Connect and then Sign in. The browser form that opens is xmemory’s own and asks for one thing: an xmemory API key, which you create on the API Keys page of the console.
5) Plugin ready
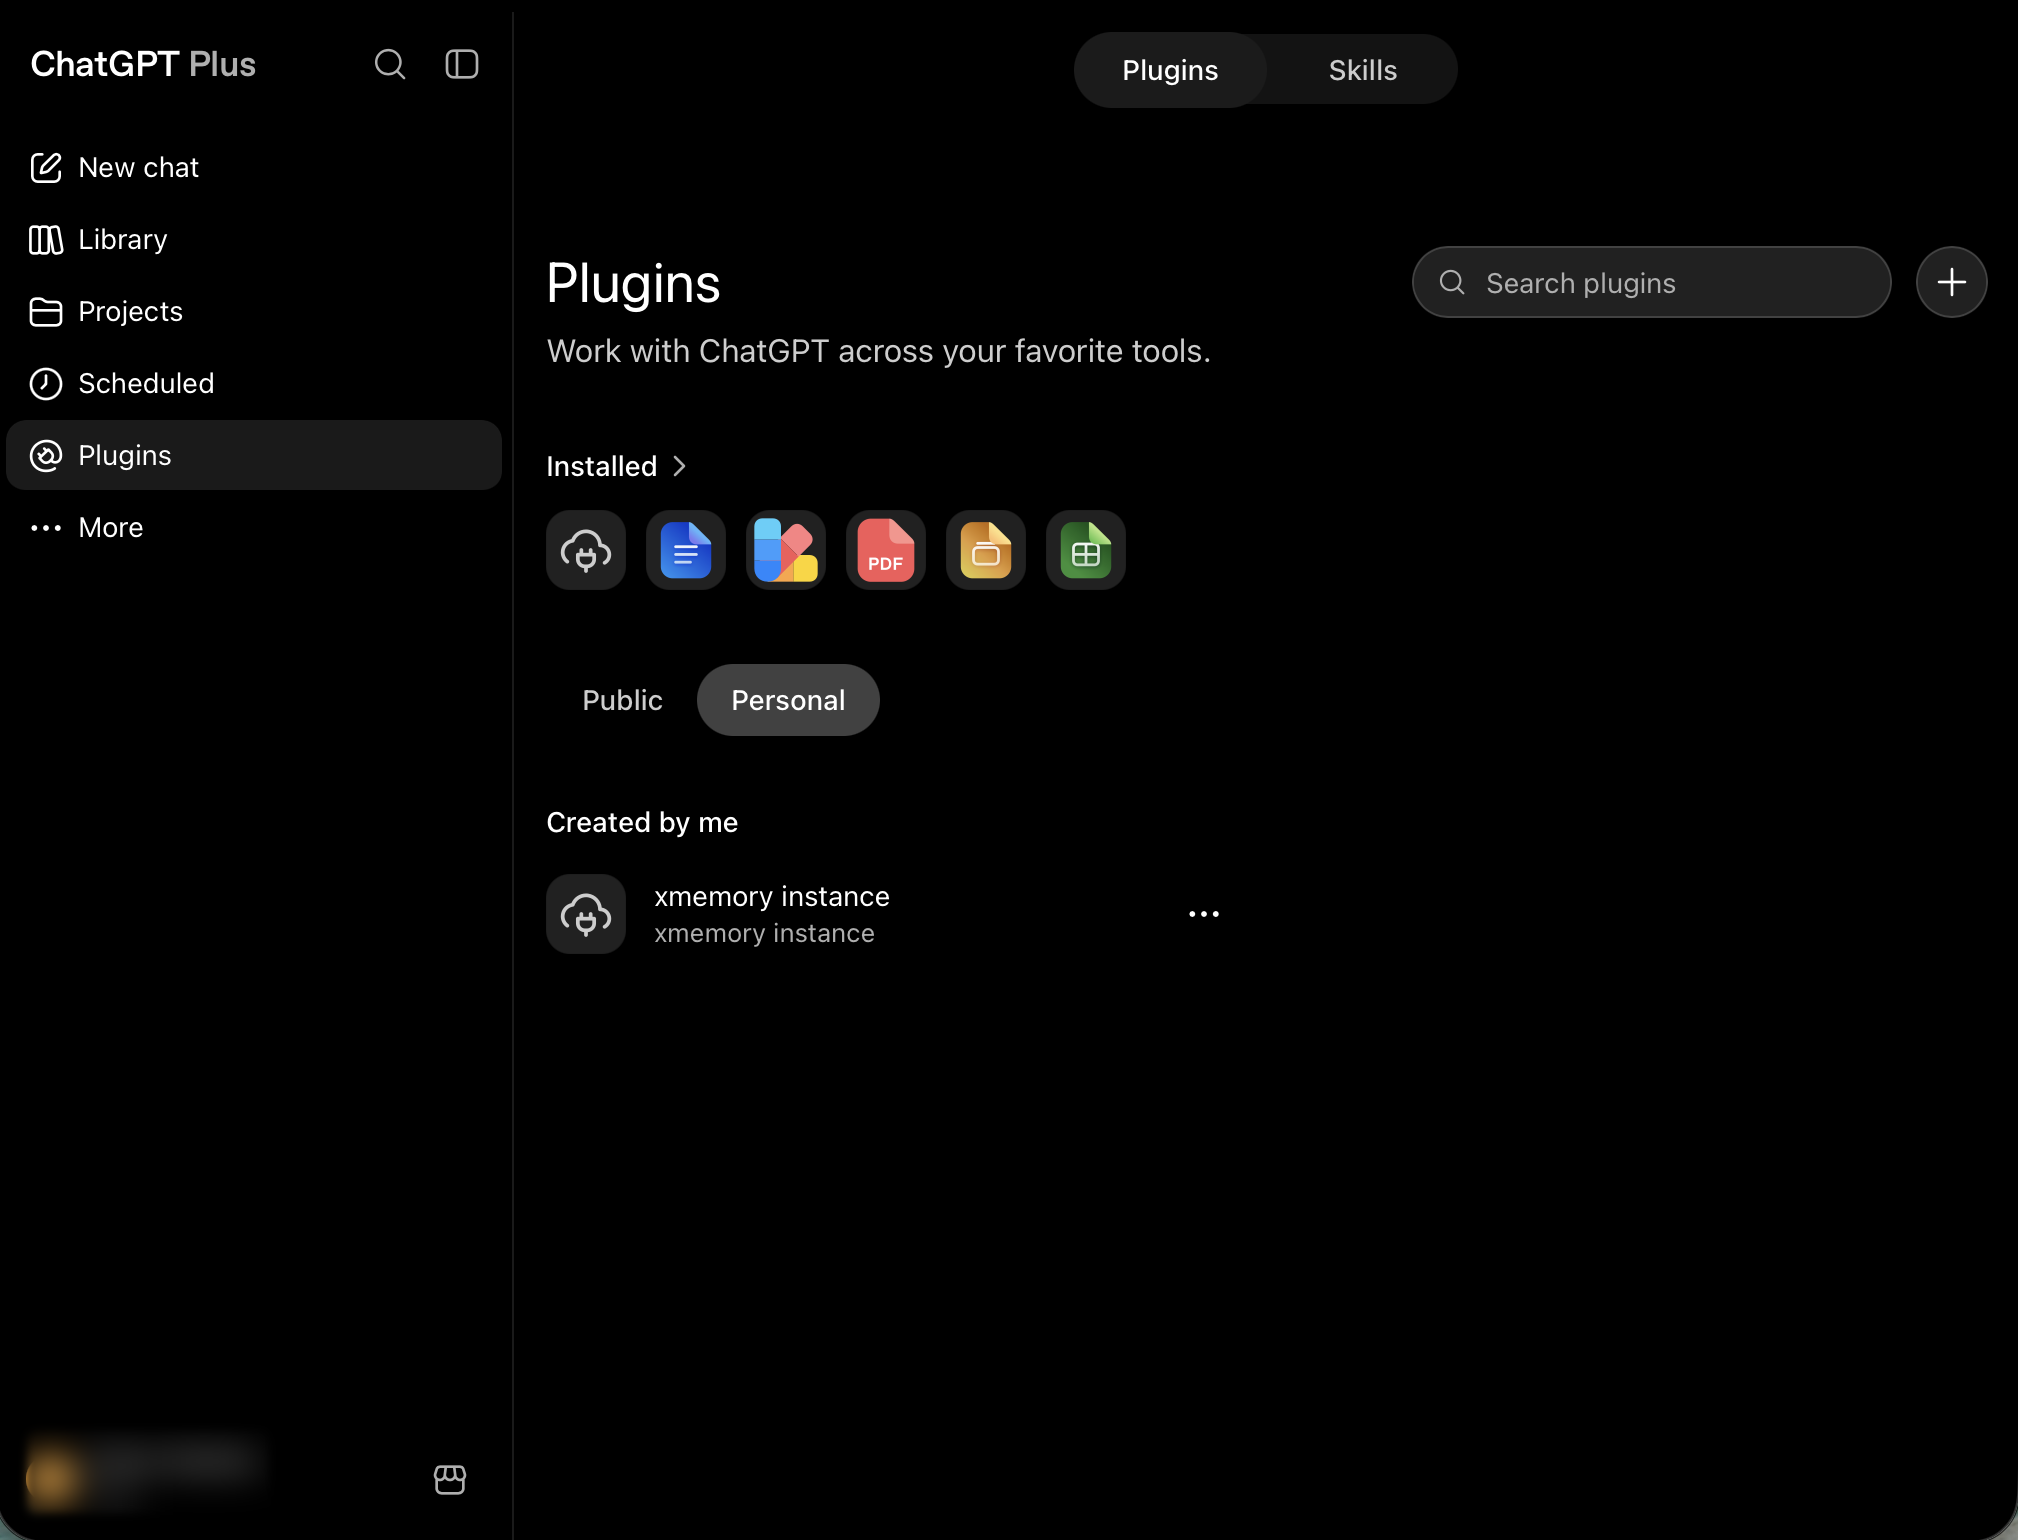
Section titled “5) Plugin ready”The plugin appears under Plugins → Personal → Created by me. Mention it by the name you gave it to use its tools in a chat; its Manage page adjusts per-tool permissions.
On Business / Enterprise / Edu workspaces custom servers may need a workspace admin; that path has not been walked, so treat OpenAI’s own documentation as the reference there.
ChatGPT desktop app
Section titled “ChatGPT desktop app”The desktop app takes a different route. Open Settings → Plugins → MCPs → + Add server, which opens Connect to a custom MCP: give it a Name, and set Type to Streamable HTTP — the form opens on STDIO, whose next field is a shell command, not a URL. Then paste the same instance URL and complete the same sign-in with your xmemory API key.
Codex (CLI)
Section titled “Codex (CLI)”For the Codex CLI, connect through the xmemory CLI: install it, sign in once by approving an emailed link, then register the instance through it:
uv tool install --upgrade xmemclixmemcli auth login --rc-dir "$HOME" --email <your-email>codex mcp add xmemory-<FIRST8> -- xmemcli mcp <instance_id>Skip the sign-in if xmemcli --json status already reports authenticated: true with its rc_file in your home directory; --rc-dir "$HOME" puts the key there, where the session-start hook reads it. If the install says its directory is not on your PATH, run uv tool update-shell and open a new terminal.
Name the server xmemory- plus the first eight characters of the instance id — the same name xmemcli instance setup prints for it; the install guide explains why a shared name collides.
Where the CLI cannot be installed or upgraded, add the instance URL directly and authorize it:
codex mcp add xmemory-<FIRST8> --url https://mcp.xmemory.ai/instance/<instance_id>codex mcp login xmemory-<FIRST8>codex mcp login opens xmemory’s authorization page, which asks for an xmemory API key from the console; the key is not written into the config file. For headless use, configure a fixed Authorization: Bearer <xmemory API key> header for the server in your Codex config instead — see the Codex guide.
See the full MCP guide for both authentication paths, the complete tool list, and error handling.
Other connection types
Section titled “Other connection types”The steps above bind to a single instance (/instance/<instance_id>). The MCP server also offers two other connection types, chosen by the connect URL:
- Admin (fleet) tools — use
https://mcp.xmemory.ai/adminto create instances, list clusters, and manage instance metadata. Admin is global-only (no/admin/<instance_id>). - Status only — use
https://mcp.xmemory.ai/statusfor the read-only status tool.
When creating the plugin, paste the admin (or status) URL as the Server URL instead of the instance URL. For Codex:
codex mcp add xmemory-admin --url https://mcp.xmemory.ai/adminSee the MCP guide for the full admin tool list.